Showing posts with label Starting Out. Show all posts

Sunday, January 19, 2025

French Skybox - Kitchen/Dining, and the Bedroom.

I'm back after a break that wasn't all my choice. After a Windows 11 update, my laptop suddenly decided that it didn't like SL or any internet browser whatsoever. Since pretty much all I do is either on the internet or in SL, it was basically a paperweight. It took about three weeks of fiddling, a couple of formats, and a downgrade to Windows 10, but I was finally (mostly) back.

Then the holidays happened and I wasn't around much as I was busy baking and prepping, and when I did have time to futz around, I realized that I'd forgotten to back up my file that had my entire list of stores and their corresponding SLURLS, and the credits for this post. That sent me into a bit of a tailspin and I got so upset at the loss of all that work. 

So, you'll be getting this post with just pictures and very few credits, because this skybox has been disassembled, and I've set up house back on my land, and it's all gone. And I'm not crazy enough to scour the pictures to try and figure out credits for everything. So I'll have to start from scratch on my next post. I'll drop some names for the big pieces, but that's about it. Sorry! 

So first, we have the kitchen. The corner kitchen is from Brocante, the little repurposed door/coffee station is from Floorplan. The dining set is from Kraftwork, and the big hutch in the dining area is from What's Next. The gorgeous chandelier is from HEXtraordinary. 

When I started this kitchen way long ago, I opted to use a modular kitchen that let me design it from scratch. For this iteration, I thought an all-in-one apartment style corner kitchen was the way to go. This one is nice because you can choose the color of the oven and the refrigerator. 

For the dining area, I loved the round table for this space. It fit well, and even though the style is a little more modern, it had classic enough lines that it managed to blend in with the more classic style of the rest of the room. All in all, I thought it came out cute and cozy. 


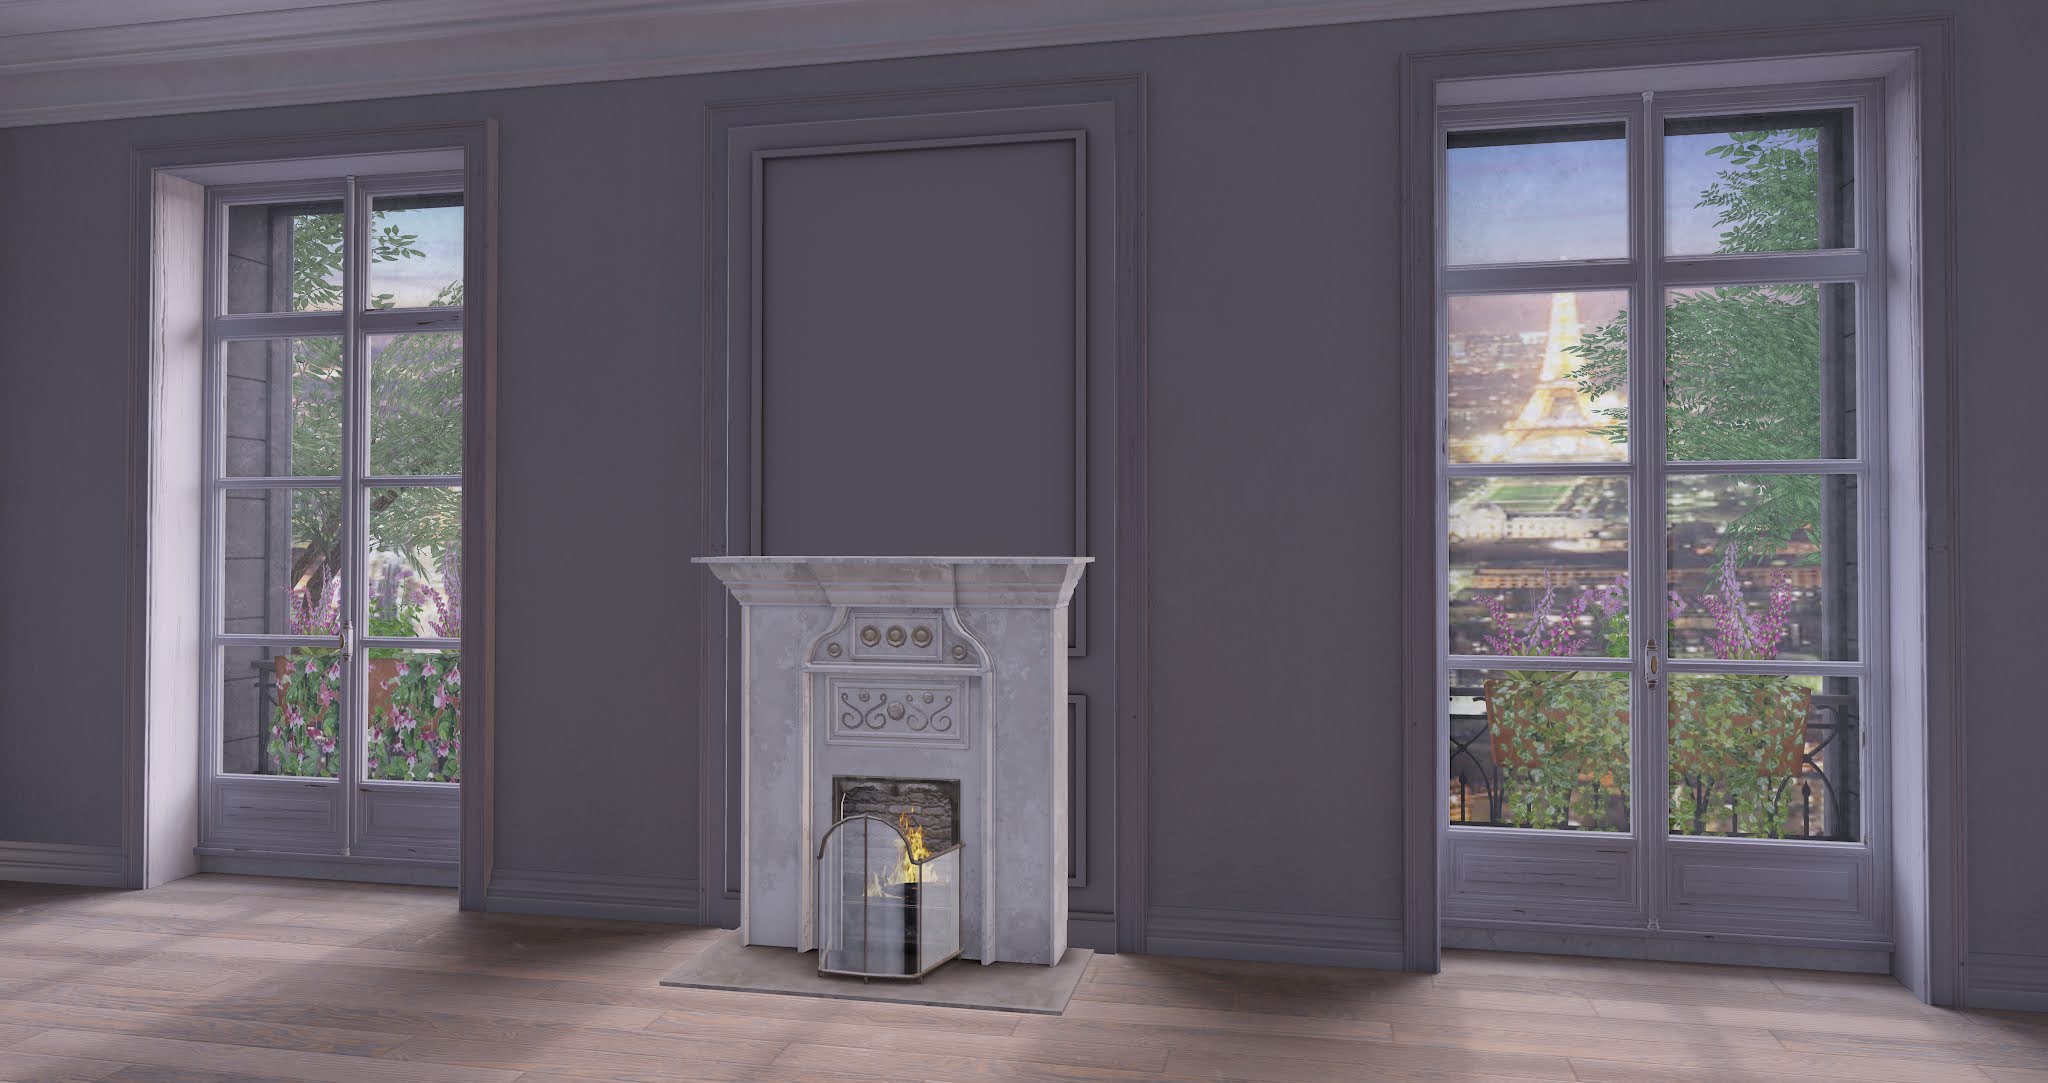
For the bedroom, I went with a bed from Apple Fall, a pouf from Elm, side tables from Llorisen, chandelier from Half-Deer, and wardrobe/dresser from What Next. This was an odd space, and I had to really jimmy things around to make it work. Putting the bed on the diagonal gave access to the warmth of the fireplace, but still gave you a nice view of the Paris skyline outside. 

The double doors to the bathroom I fiddled with to make them sliding, so I had room for the wardrobe and dresser without having to worry about doors getting in the way. The room came out so feminine and warm, and just the place I could see snuggling into bed and enjoying the fire while reading myself to sleep. 


As I mentioned above, I've moved back down to the ground for spring. I found a cute house from a "New to Me" builder! I'll probably feature that down the road, as it has so many great features for being such a small house. I was also considering doing some designer features, and we'll see what else I can think of as I try to rebuild this damn blog. 

Thank you for your patience, and sticking with me. I know my posting is sporadic, but life is like that sometimes. I hope you all had a great holiday, and are ready for the shit-show coming. Brace yourselves! 

Love you guys. <3

Thursday, November 14, 2024

French Skybox - The Living Room

I love this room. I find it so cozy and inviting, in soft base tones with little pops of color everywhere. And of course, a kitten sleeping on her favorite pillow by the fire. I love the formal-ish style furniture through most, but then having a little corner with the cat condo and toys scattered about. To me, it makes it more than just a show-house for a blog, it makes it a home. 


And now, the dreaded Credits!

Living Room
A.D.D.Andel! - Large Crystal Decor
Apple Fall - Amelie Magnifiers 
Apple Fall - Books - Arrangement 2 
Apple Fall - Coral Specimen
Apple Fall - Hydrangea Bunch - Sakura 
Apple Fall - 'iFall' Notebook 2015
Apple Fall - Nauticus Shell Vessel
Apple Fall - Joanne Crystal Lamp 
Ariskea - Apple Blossom Flowers Vase[White] 
Ariskea - Jeanne Floral vase [Rose] 
Ariskea - Shy Ivy Old window [Summer]
Balacalva!! - Books [Vertical B]
Balacalva!! - Hamilton Lamp 
Bazar - Charlotte Bureau Set
Bazar - Cora Modular Bookshelf (Assorted Books and Items) 
Bazar - Magnolia Bookcase Set
Brocante - Lydia Chair / Grey 
Brocante - Lydia Sectional / Grey
ChiMia - Marais Side Table 
C-Outlet - Hibiscus Purple Flowers 
Celeste - Galaxy Crystals
Disorderly - Crystal Collection / Display Boxes
Dust Bunny - Pom Pom Plant
Enaitch - ::KKs:: Simple panel wall - txt pack - vintage 
Fancy Decor - Aloe Phone Dock
Fancy Decor - Bernard Geodes
Fancy Decor - Julian Wine Glasses 
Fancy Decor - Obelisk - Group 
Fancy Decor - Saturn Record Player 
Finca - Cat Play Tower 
Finca - Whelk Sculpture
Freebird - Small Geode - Aquamarine (Gacha)
Half-Deer - Cheri Glass Bookcase
Half-Deer - Princess Chandelier - Gold  
Hideki - Echoes of Memories - Decorative Plates
Hideki - Record Crate 
Jian - Kitten Pillow 
K.G. The Rug Store - Gray White Contemporary Rug #2 
Kalopsia - Brea's Geode Slices
KraftWork - Bellosguardo Book Collection
KraftWork - Taylor Modular Sofa - Add-On Blanket 
MadPea - Crazy Cat Lady's Starter Kit - Butterfly Toy 
MadPea - Crazy Cat Lady's Starter Kit - Toy Mice 
MadPea - Crazy Cat Lady's Starter Kit - Treat Dispenser 
Muniick - Roebling Lounge Bar Cart (Select Items)
Muniick - Roebling Lounge Fireplace Tool Set 
Muniick - Roebling Lounge Firewood Holder 
Muniick - Roebling Lounge Stack of Bar Glasses 
North Oak - Lillias Tea Set
Nylon Outfitters - Dark Academia Set - Beetle Specimen Cloche 
Ordem da Rosa - Framed Pietre Dure Pictures 
Petrichor - Kuni Agate
Pitaya - French Vintage - Antique Mirror 
Scarlet Creative - Cordelia Fireplace MT (Gacha)
Sequel - European Wall Medallion (Used on Ceiling, and re-textured)
Tartessos Arts - Boss Drinks Tray (Modified)
The Vordun - Vanitas Still Life, 1603 
Vespertine - Exotic Plants / Pilea 
Vespertine - Peace Lily Plant 
West Village - Macaron Assortment 
What Next - Chloe Sheer Curtains 
Zaara - Goa party - 25 Trance Cds (Gacha)
Zerkalo - Sighisoara Casual - Mirror & Painting 

As always, if you have any comments or questions, I love to get feedback! Leave me a comment here, or inworld. 

Sunday, November 10, 2024

A Long Time Ago...

In some blog posts far, far away, I started to modify and decorate a French style skybox. This is a continuation of that series. 

I'm back! Holy shit, it's been over a year. I had no idea it had been that long, but there you go. The blog posts mentioned above are all the way back from when I started this blog back in 2021. If you're interested in reviewing those, I'll link them down below:

The Big Purchase

Renovation Time!

Doin' The...Kiiiiitchen!


All the renovations I did at the time to the Lueur skybox from Varonis I recreated when I reset this skybox up, but everything else is different regarding the surround, the window boxes, and the decor and furnishing that I started working on. 

I was going to do the whole shebang in one HUGE post, but you know...the credits were just too much. I had to break out Excel to sort everything by room, and that's when I figured I'd do it in three parts. Entryway and Bathroom, Living Room, then Kitchen and Bedroom to wrap things up.  

So, the vibe I was going for was a rainy Paris autumn night, with soft lighting, inviting fireplaces, and deep shadows. Of course, if I did the pictures in that lighting things would be hard to see, so I made the decision to brighten things up. I went for elegant decor, lots of gold frames on everything, velvet couches with chenille knit pillows, and soft blankets, vintage fixtures in the bathroom...well, you'll see. 

So let's start out with the Entryway. The main focus of this space is of course the gallery wall. I thought this was a great way to decorate and add visual interest without adding a lot of clutter to such a narrow hallway. But I did want to add a small bench and coatrack to make it welcoming. 


Next up is the bathroom. I really wanted to put fixtures in here that looked like they'd been around in this apartment for a while. The sink and toilet from Apple Fall, now in their outlet area, were perfect. Then I found this cool shower in my inventory from Kraftwork, and I had my set. I probably could have added a tub, but honestly in RL I never use my tub, so I opted instead to add a storage cabinet for linens and other odds and ends. 


I am a total packrat, and rarely get rid of anything I buy, so there's a chance through these posts that some of the items I used are from stores that have closed, or are no longer available, but I'm sure if you find something you like that can no longer be purchased, I'm sure someone somewhere has something comparable. 

And now, on to the credits. With the credits, I list everything the best I can. If there are multiple items for the same store, I only link the SLURL/Marketplace store on the first one, because doing them all is tedious, and frankly unnecessary. As always, if you have any questions about anything, please hit me up and let me know! I love getting feedback from my readers...if I have any, anymore that is. 

Skybox and Exterior
Varonis - Lueur Skybox
Jian - Ash Tree (Tall) 
Pixel Mode - The Heights Studio Apartment (Surround Only)
What Next - Summer Window Box 

Entryway
Angelic Visions Antiques - Victorian Coat Rack 
Apple Fall - Hall Bench 
Noctis - Mistress May's Picture Collection  Mesh Multi Frame 
Nomad - Antique World Maps 
Nutmeg - Rainy Weather Clutter Boot Rack (PBR) 
Salm's Store - Ornate Beige Traditional Runner 
Schultz Bros. - 3 Vintage Picture Frames 

Bathroom
Apple Fall - Crumpled Newspaper 
Apple Fall - Lange Toilet 
Apple Fall - Plant Stand, Short - Iron 
Apple Fall - Mercantile Bookshelf - Double w/ Doors 
Balaclava!! - Melby Radiator (White) 
Balaclava!! - Melby Soap Bottles (Cool) 
Bazar - Cora Frames
Bazar - Floria Soap 
Black Nest - Kaipaus Hair Care 
Chez Moi - Round Rug Leeloo 
Cinoe - Courteous appearance - Facial wash 
Dust Bunny - Laundry Room Clutter - Cloth Stack 
Dust Bunny - Laundry Room Clutter - Containers
Dust Bunny - Laundry Room Clutter - Detergent Bottles 
Dust Bunny - Laundry Room Clutter - Rolled Towels
Dust Bunny - Lauren Bathroom - Cotton Ball Container 
Dust Bunny - Lauren Bathroom - QTip Container 
Dust Bunny - Lauren Bathroom - Toothbrush Holder 
Dutchie - 3 Toilet Paper Rolls 
Dutchie - Natural Sponge 
Half-Deer - Vertical Wall Garden - Small 
Hive - Cone Boxwood Topiary
KraftWork - Cast Iron Shower 
MadPea - Crazy Cat Lady's Starter Kit - Litter Box 
Soy - Shug Rug 
Striped Mocha - Story Sconce  
StuffMart - Hair Dryer - White 
Theosophy - Beaumaris Mirror (No Longer Available.)
Tres Blah - Savon De Tres Blah (Gacha)
Your Dreams - Small bathroom - Paper holder 

Friday, September 3, 2021

A Place to Dine, and Enjoy the View...

Hi Ducks! Sorry it's been so long between posts. I have been EXTREMELY LAZY this past week. I also haven't been feeling 100%, and that didn't help. Anyways, today I'm setting up the dining area, and this post will be a bit less wordy than the last couple. 

Last post when we did the kitchen, I went with a very traditional, somewhat "shabby chic" look for my cabinets, so I decided to keep that flow going with the dining furniture. The Muniick kitchen set also had a freestanding hutch cabinet, so I opted to use that in the dining area. The decor inside is from the What Next - Sofia Dresser with Decor set which I had originally considered. It was very cute in that space, but I couldn't get it looking just the way I wanted it, so I went with the alternative that made more sense. 

The table is the Apple Fall - Country Table. It has that same weathered look to it, and the round table fit so nicely in that corner. The chairs are from the Apple Fall Plantation Kitchen which I mentioned in the last post. Now, the chairs rez all in white, which is nice, but I wanted the cushions to match the blue in the kitchen tile, so I opted to recolor them. 

How did I do that? Well, let me show you! 


Edit the item, and go to the Texture tab. Select "Select Face", and click on the area you want to recolor. As you can see from the picture above, the arrow points to the area I've chosen, which encompasses all the cushion area. Then click on "Color" to bring up the color picker menu. 


Choose the color you want the item to be, in this case I chose a dusty sky blue, and click OK. It's that easy! (At least in this case. Be aware that it might not work so well on some items. As with any mesh item you try to modify, the creator might not always make it so easy, so sometimes it will be trial and error.)

Now, another thing you might have noticed from the picture of the dining room furniture, is that there seems to be a view other than just sky outside. I opted to do some landscaping of a sort, and I'll outline below what I did. 

First off, I needed a backdrop. Unable to find a panorama picture of Paris that I liked, I remembered that another skybox I had from AT Designs Skyboxes - The Reality Loft B124 - had a great backdrop system. So I rezzed it, and from the backdrop picker inside the skybox, chose the Paris option, which is a lovely sunset view, with the Eiffel Tower all lit up. I unlinked the backdrop from the skybox, and deleted the rest of it. 

I then moved it in front of the windows of this skybox, and stretched it to cover that side. Below is the outside view. The reason I tilted it the way I did was so if you're standing closer to the window, you won't notice the empty space between the skybox and backdrop so much. I also wanted to add a couple of trees, to give the illusion that this is an upper story apartment, and to give some depth to the view. The trees I used are from the JIAN - Ash Trees collection. I used a couple of the smaller, 1 LI trees. This kit includes a HUD that lets you pick the bark and greenery of the season, so you can customize them as you desire. 


The last bit I added to the outside were some window boxes, specifically the  World of Wood - Balcony Flowers. They're only 1 LI a piece, and while not the most detailed, when looking at them through the wavy glass of the skybox, they look pretty good. 
 

Using these window boxes also helps disguise that empty space between the skybox and the backdrop. But I had to really manipulate the camera to see that area. When you're just at regular eye level, you can see that you end up with a very pretty view.


That's it for this post! I know it's not as long or detailed as the others, but as usual, if you have any questions about anything, please let me know in the comments, or hit me up inworld, and I'll be happy to show/explain what I can. 

Next time, we'll start furnishing the living room above. Couches, tables, bookshelves, maybe a desk? We'll see what fits. I was browsing Instagram, and found an apartment much like the one we're working on that was done with more modern furniture, and it looked pretty cool, so I thought I'd try it out. 

Until then, take care and stay well. ðŸ’–

Tuesday, August 24, 2021

Doin' The...Kiiiiitchen!

Hi there Pigeons

So, now that we have our skybox renovations done, it's time to start furnishing. When I furnish a place, I try to put all the big furniture down first, before adding knick-knacks. This is especially important to do if you're on a small parcel, with fairly limited LI availability, as I am. It gives you an idea of what you'll have left for decor and clutter, once all the main stuff is rezzed. Because it doesn't do you much good to use 80% of your prim allowance on just two rooms, when you have five to work on. 

It let's you edit...is your kitchen too primmy? Do you have too many chairs in your living area? Is your bed's LI count ridiculous? You have a chance to select other items that might suit your LI availability better, and give you more leeway for decor. 

Today I'm going to concentrate on the kitchen. Since it's usually the most intensive room to put together, I like to get it out of the way first. As with your parcel, it's good to get a measurement of the available space.

As with buying a house, you want to make sure that if you're going for an "All-In-One" kitchen, where everything is included in one linked mass, or just a couple of pieces rather than being fully modular, that it will fit in your allotted space. Below I'll post some that I happen to have in my inventory that fit the area shown, to give you some ideas. But when you go shopping, remember to take a copy of this prim, so you can use it to "measure". 


This pretty kitchen is made with the following:
Post - Marquette Monitor Top Fridge (6 LI)
  Both of these items feature color changeable options, and have a cute, early 20th century look. And Dysfunctionality is WONDERFUL about keeping the LI low, while keeping a lot of the pretty details. 


This more industrial looking set is made up of:
Vespertine - Small Spaces Kitchen (5 LI)
Balaclava!! - Tricia Shelf & Plates (2 LI)
  (Not on Marketplace, so here's a SLURL. Comes with a plain shelf and separate plates, too.)
ChiMia - Kitchen Trolley (1 LI) and Ladder Pan Rack (3 LI)
  I've used this kitchen in a more cottage setting, but it really isn't appropriate for an elegant Parisian apartment, but I figured I'd include it. Of course you'd want to find some more stuff to fill it up, this is just a very basic look. 


This cute kitchen is from:
Trompe Loeil - Timeless Kitchen in Teal (29 LI as shown.)
  (Also comes with a Cafe' Table and Chair - Not shown)
  I love this kitchen, and have used it A LOT. Trompe Loeil also has bigger, newer kitchens, too, so if you like this, you can check out the others. This has a more mid-century-modern feel to it, which again isn't the most appropriate for the space. 

Now, let's talk modular kitchens. Like RL kitchens, these give you most flexibility with setting up your kitchen space. They generally also use up more LI, but it can be worth it to get just the kitchen you want. They're especially great when they allow you to change colors on anything from the cabinets themselves, to the backsplash and countertops. I'm going to give you links to the ones that I have, but of course you'll need to do your own research and figure out what works best for you. 

Consignment - Catia Kitchen (Comes in White or Black)
  This is a VERY pretty kitchen, that goes with any number of home styles. This kitchen does have glass fronted upper cabinets, and remember...that means more decor is needed to make it look "full". But, this kitchen comes with custom, low LI decor items, which is a nice feature. 

  This is a great galley kitchen, that works with vintage and modern styles. I've even mixed and matched the upper shelves and cabinets from this set with the Vespertine set I showed above. 

  (The Stove is sold separately, and is not on the Marketplace. Kitchen and Stove may still both be available at the Apple Fall store in the Outlet/Discount area.) SLURL
  This is a gorgeous set...it's from Apple Fall after all...so you know the textures and workmanship are exquisite. Again with the glass front upper cabinets, so keep that in mind. 

  This is an older kitchen, but still great! Just note it rezzes with Full Bright turned on, so you'll want to turn that off. Also, it's a bit oversized so keep that in mind. It's wonderful in an industrial or cabin type space, being all wood and iron. I have the Dining Room set too, and really love it. I've used this one a lot in my more modern homes. 

  This one is fairly new to me, and I've only used it once, but it's wonderful in a big, modern, airy house. The big island is great for additional seating, and to use as a divider of sorts if you have a multi-use space. 

So now...(drumroll please) let's get to the kitchen I'm using for my space.
I chose this kitchen because I like that it has four different colors of cabinets, and the light or dark countertop is a nice feature. It has a nice European type look to it that I thought would be perfect in this space, and I've bought some other items from Muniick, so I knew the quality would be good. I did get a few individual decor items, but skipped the whole set, as I already have a ton of kitchen decor. The picture below shows the different available colors. 


So, how did I set it up? Let me show you!


Figure 1 - First, I set the corner cabinets. I suggest NOT resizing these, and putting them down first, to set the base for your kitchen. 
Figure 2 - Next, I add the other major items, here being the sink, range, and refrigerator. (Note: The fridge and fridge cabinet in this set are ginormous, so I did size them down to make them fit the space and my avatar better.)
Figure 3 - This is where you can fill in space with the individual cabinets. I added another lower cabinet to the right of the stove to give it a finished look, and a set of drawers next to the sink. Generally with these cabinets you can fiddle with the size to get them to fit properly. In this case, I stretched the drawers to fit the space between the sink and the corner cabinet. 
Figure 4 - Lastly, I added the upper items, in this case the range hood, a couple of corner shelves, an upper cabinet, and the fridge surround. 

Below, is the finished product. 


I did make a couple of changes to the range hood. I wanted full tile for the kitchen area, so I did an "Edit Link" on it, and made the pot faucet transparent. Since the partial backsplash contained the script for the light, I made it transparent as well, and moved it so it would be in front of my tile wall, thereby still accessible. I thought the Art Nouveau tile suited the space well, and I tinted the cabinets a bit, as they were still a bit bright for the space. 

All in all, I'm pretty happy with how it came out. It's about 30 LI as shown, and I think I can live with that. But you never know...things could still change, but let's hope I can keep it. 

 I did start work on the dining area, but as this post is already pretty long, we'll get to that in the next one. Take care, and see you soon! ðŸ’–

Tuesday, August 17, 2021

Renovation Time! (edited)

It seems like no matter how perfect a build is at first glance, there always seems to be a few things that you want to change. I rezzed my new skybox on ground level, got it situated comfortably on my parcel to allow me space on all sides, then I sent it skyward. I had already done my homework to find out where in the sky I could put it so that there wouldn't be all kinds of neighbors around me, and I did that by checking out odd elevations. 

A lot of people will go for even numbers up in the sky. So instead of checking at 1000 meters, 1500 meters, 2000 meters, etc., I chose an odd number of 1320 meters. It was perfect, so that's where I sent my new place. 

As I take my own advice, I then put some landscaping down on ground level, to get that out of the way, and ensure that I wouldn't overdo my skybox and run out of LI before I had a chance to do it. It's not amazing, but it does the job. 

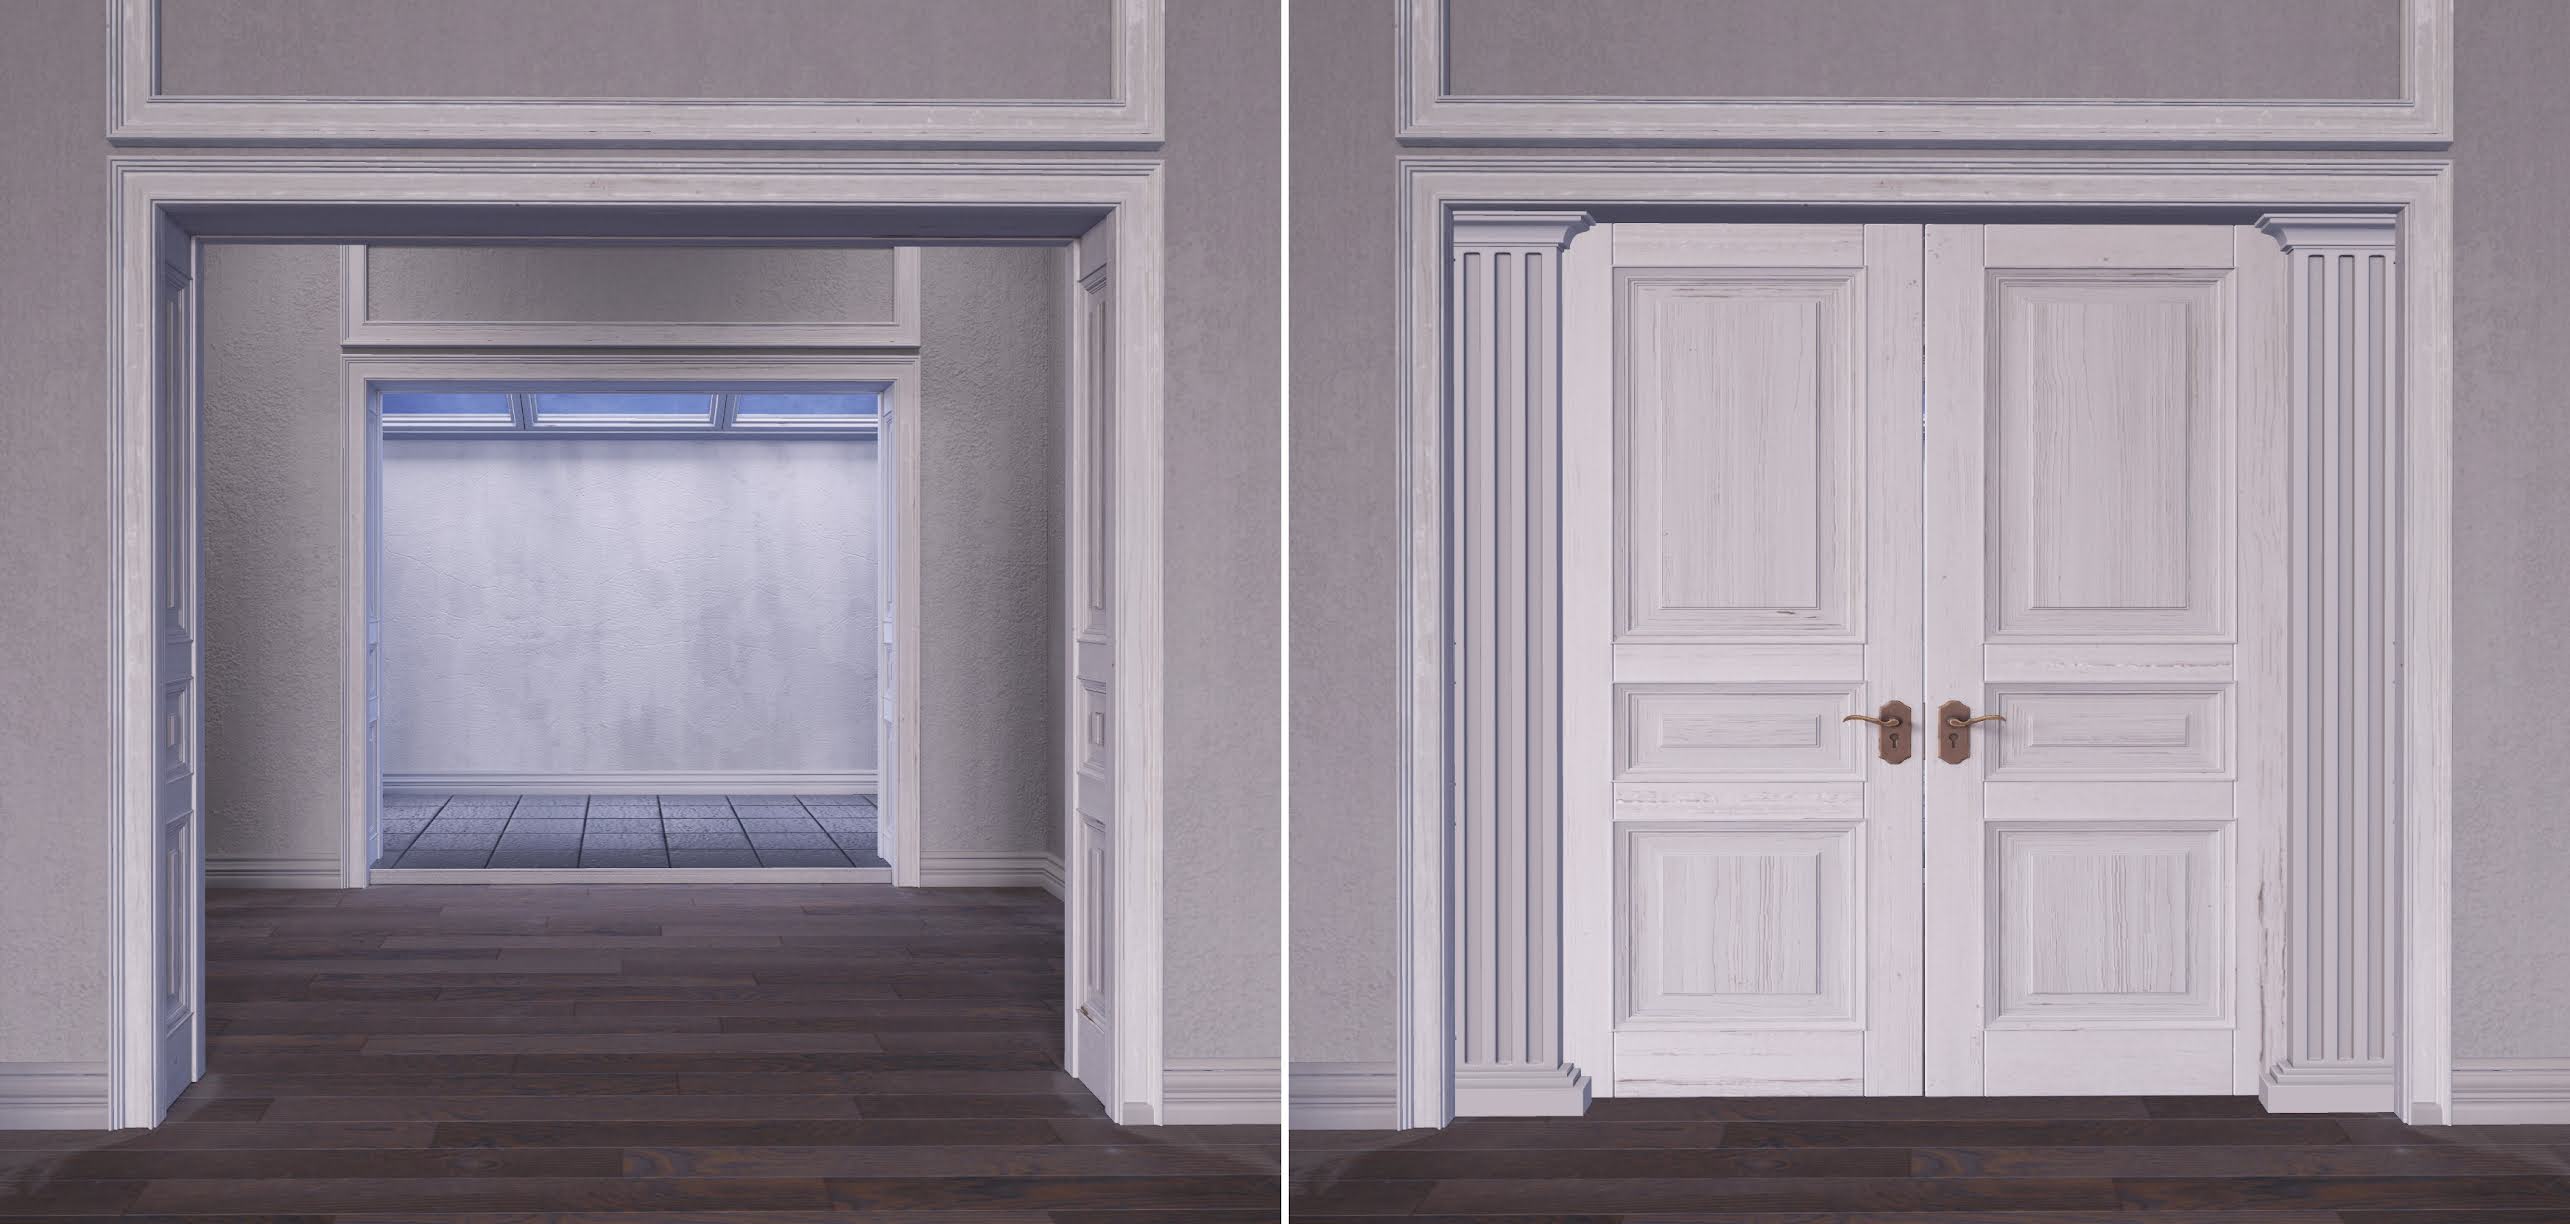
I then tp'd up to the skybox, and figured out what I wanted to fix. The first thing was the doors to the room where I wanted to put the kitchen and dining area. They had to go, because I wanted that room open to the living area. To do that, I clicked "Edit" on the skybox and checked "Edit Linked". I selected the two doors, and clicked the "Unlink" button, to unlink them from the rest of the skybox. As I planned to repurpose them, I didn't delete them, just moved them out of the way. 

(Edited to add...When unlinking pieces/parts from a build, it CAN cause issues. If you unlink the root prim, and there are any scripts or anything in it, it can cause things to stop working. Unlinking in mesh creations can also mess up the physics of the item. Always make sure that anything you adjust is copy/mod, so if it blows up on you, you can rez a new one. Testing first is important!)

Here's the Before and After:

Once that was done, I went into the bed/bath suite, where I wanted to ADD some doors. Right now, the two doors I was going to repurpose opened out, and I wanted them to slide, as I planned to make them pocket doors. So I went to the Marketplace, and found a cheap and easy script to use. I then edited each of the doors, went to the "Contents" tab, and deleted the script that was in them, and replaced it with the new sliding door script. 

I added some pillars from the Fancy Decor - Classic Wall Panel Kit to either side of the door opening to form the "pockets" for the doors, did my best to tint them to match the surrounding environment, and maneuvered the repurposed doors into the doorframe, and fiddled with them until I had them centered. With the new script, I set them up by clicking and holding on them until the setup menu appeared, and again fiddled with them until they opened up the way I wanted them too, and as far open as I wanted. 

Here's the Before and After (and After, Opened):


Now that I knew that my bathroom would have a little privacy, there was just one more simple change to make. While the bedroom came complete with a fireplace, the living area did not, and I generally prefer having a fireplace in the living area, as a gathering point to put the rest of my furniture around. So I decided to block the center window, and put the fireplace there. 

To do so, I used the Fancy Decor - Simple Wall Panel to block the window, stretching it until it fit properly. It also comes with a HUD to let you adjust the color some, so I used that, then edited it to get the color to (mostly) match. For the fireplace, I used the Scarlet Creative - Cordelia Fireplace. It's a gacha, so I won't link to any here, but I did find one on the Marketplace for as low as 119 L$. I honestly might swap it for the Dysfunctionality - Christine Fireplace, as that fireplace is lower in LI, and has a TON of different colors and textures, and controls for the fire itself. It's an amazing deal for the price, and comes in both a wall and corner option. 

And here's the last Before and After:


So for the next post, we'll actually get started on decorating! I'll be away for a long weekend, but hopefully I can get started on that next week. Bought a new kitchen set that I'll be featuring, so we'll see how that goes. 

Everyone take care, and have a great rest of the week! (And if you ever have any questions, or need any help, hit me up in the comments or inworld! My full name is Skye Donardson.) 
 

Thursday, August 12, 2021

The Big Purchase

Buckle up kiddos, this is going to be a long one.

In the last post we talked about some of the prep to help with purchasing an SL home. For my workspace, I've decided on a skybox. So now that I've decided on this, I need to find one. Now, if you've done any shopping inworld or on the Marketplace, you know how freaking overwhelming this can be. 

Personally, I'll usually go out to the Marketplace to start, and to help narrow things down I'll put in the style I want. Even still, if you type in, say..."Modern", you're going to get a ton of results. You can start to narrow it down by going to Buildings and Other Structures -> Other Structures -> Sky Boxes, do 96 items per page, and sort by your criteria. If L$ is a constraint, set your range, then you can sort by "Newest First", so you can see the latest and greatest. Or if quality is important, you can sort by "Rating: High to Low". 

When you see one that looks promising, see if they list good details, like the dimensions, the Land Impact, and whether it's available to view inworld. Trust me, that last item is important. You're going to want to see it, walk through it, and determine if it's really what you want before you buy. What may look perfect in the listing, can end up being a dud once you're inside it. If it seems to fit everything you want, add it as a favorite, and keep going. 

Once you have your list of favorites, start checking them out inworld. I'm not going to lie...this can be a slog. For my skybox for this project, I went to countless stores, often more than once, nit-picking everything. Can I afford it? Does it have the space I need? Will it fit? Can I manage a higher LI for the one I want? Are the textures good? Now, you might not be that exacting, and that's fine. But I'm a picky bitch, and want it perfect. 

For my skybox, I wanted "Parisian". My home right now is VERY modern, and I enjoy a contrast, so I wanted this skybox to be the opposite. A little worn and shabby, but still classic and elegant. I had some that already fit the bill, but they were either too large, too new looking, or too small. I had to find my Goldilocks skybox, so shopping I went.

Below is a list of the skyboxes I toured/own, and at the end, the one I finally chose. 

Apple Fall Parisian Skybox - Beautiful, as all Apple Fall stuff is, but too small.
Apple Fall - West Village Belgravia Skybox - Peeked at this while at Apple Fall, but it too was too small. BUT IT'S GORGEOUS. 
Apple Fall - London Apartment - And one from Apple Fall that I already own, and while a favorite, it's just far too big. 
BA - Paris Loft Skybox - One from Barnesworth Anubis that I considered, but in the end was just a bit small.
BA - Paris Penthouse: Deluxe Suite - This skybox from Barnesworth Anubis is one that I have, and while it AMAZING, it was just far too large. But seriously. If you want the ultimate Paris penthouse, this one I highly recommend.
Trompe Loeil Margaux Skybox - Gorgeous, but too small. But ask me how many Trompe Loeil houses I have. (The answer is OH SO MANY.) 
NG-Designs - Life in Provence Skyloft - This one from NG Designs was cute with the outdoor terrace, but it just wasn't quite what I was looking for. 
Milk Motion - Paris Haussmann Apartment - Gorgeous skybox from Milk Motion, but too high in L$ an LI. 
Diamandis - Parisian Apartment Skybox - A pretty little skybox from Diamandis that was, alas, too little for me. (A new to me store, with really great skyboxes!)
Vespertine - Spring Rainy Days Skybox - I actually already own this skybox from Vespertine, and while I love it dearly, it was just a little too cramped. 
Tarte - Primrose Skybox - From Tarte...very pretty, but just didn't strike me.
Tarte - Autumn Attic Skybox - And another from Tarte...this one was actually one of my finalists, but I ended up not wanting an attic-y look, so I passed on it.

AND THE WINNAH IS...
Varonis - Lueur Skybox - From Varonis, a store I'd never heard of before, but OMG, their work is incredible. This apartment is nearly perfect, and I fell in love with it the second I landed inside of it. The LI is a bit high, but I can work around that. (Their other apartments are also incredible, so I highly recommend checking out their selection.)

What did I tell you?? I looked at A LOT of shops, and A LOT of skyboxes to find just the one I wanted. 

Sticking some pictures below of the new place. I'm so excited to get started on it, but that will be in the next post, as this one has gone on entirely too long. 


Monday, August 9, 2021

Let's Get Started!


So, I've rented a parcel - quite nicely neighboring my current home - which will be my workspace for this blog. What to do with it? Well, the first thing I usually do, is measure it. I do this because whether I choose to do a ground house or a skybox, I need to make sure that what I choose is going to fit. 

As shown below, for a ground house I'll rez a box, and stretch it to fit the AVAILABLE space that I have to work with. Just note, that this space might not be the full size of your parcel. It will be the open space you have to put a house and some landscaping down on. Usually this size will work for a skybox as well, as they generally tend to be a bit on the smaller size. I label it with the measurements in the name and take it into my inventory, so I have it handy as I go shopping. Why? Because sometimes you run into creators that for some reason fail to put the basic footprint size of their houses anywhere on their advertisements. 


So what do you do if you're not sure it will fit, and you can't rez your parcel footprint? This is going to sound silly, but go into the demo, and stand as close to the middle of the house as you can. Turn off your AO, get into a simple stationary pose, then attach the panel that you made to your spine, or your groin, or something central on your body. It should attach to that center point, and if you cam up, you should then be able to get a pretty good idea of whether the house will work. 

It looks stupid, but I guarantee you'll be happier doing that, then spending L$ on a house that's too big. Because keep in mind that putting a house that's too large on a parcel looks disproportionate. If you really need the room, it's easier to go up and get a multi-story house, then have it all spread out in a one level ranch that takes up too much space.

Unless, of course, you decide to go with a skybox. Then you'd probably have a bit more wiggle room. You just need to figure out what is going to work for you. I would suggest that if you're on a private sim, and decide to go with a skybox, do try to leave some LI balance to at least put a few trees and some grass at ground level. It keeps the sim looking nice. If you're on the Mainland, and doing a skybox more out of necessity? I generally wouldn't worry about it. 

I have decided for this project, that I'm going to concentrate on doing a skybox. In the next installment, we'll go through what I currently have, and possibly go shopping for a new one. Because one can never have too many, you see. ðŸ˜‰